

The Chicken House
The chickens were the first of our animal escapades here at the Ranch. I knew I wanted a big coop (my Dad’s motto is if it is worth doing, it is worth over-doing) and I had an elaborate plan to build a shed with attached run. Dad pointed to an old 10x12 shed on the property that we hadn’t yet found a purpose for, and suggested starting there, so the work began! I was mocked throughout the process for doing a ridiculously grand chicken mansion, but I was determined.
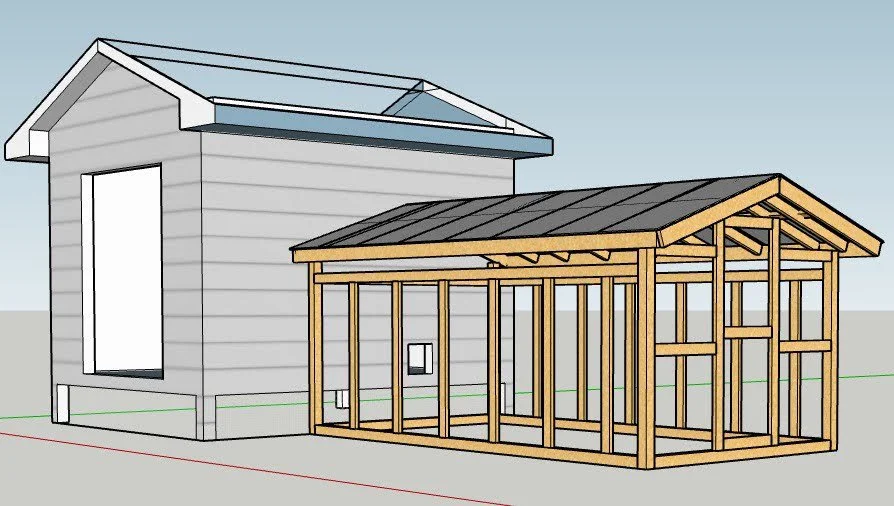
Sketching up the first concepts
The design underwent a few revisions before I was happy. I have a full set of plans if you are interested.
The first step was to move the shed, and at the recommendation of a neighbor to predator proof, we poured concrete piers, built a base and raised it up off the ground two feet.
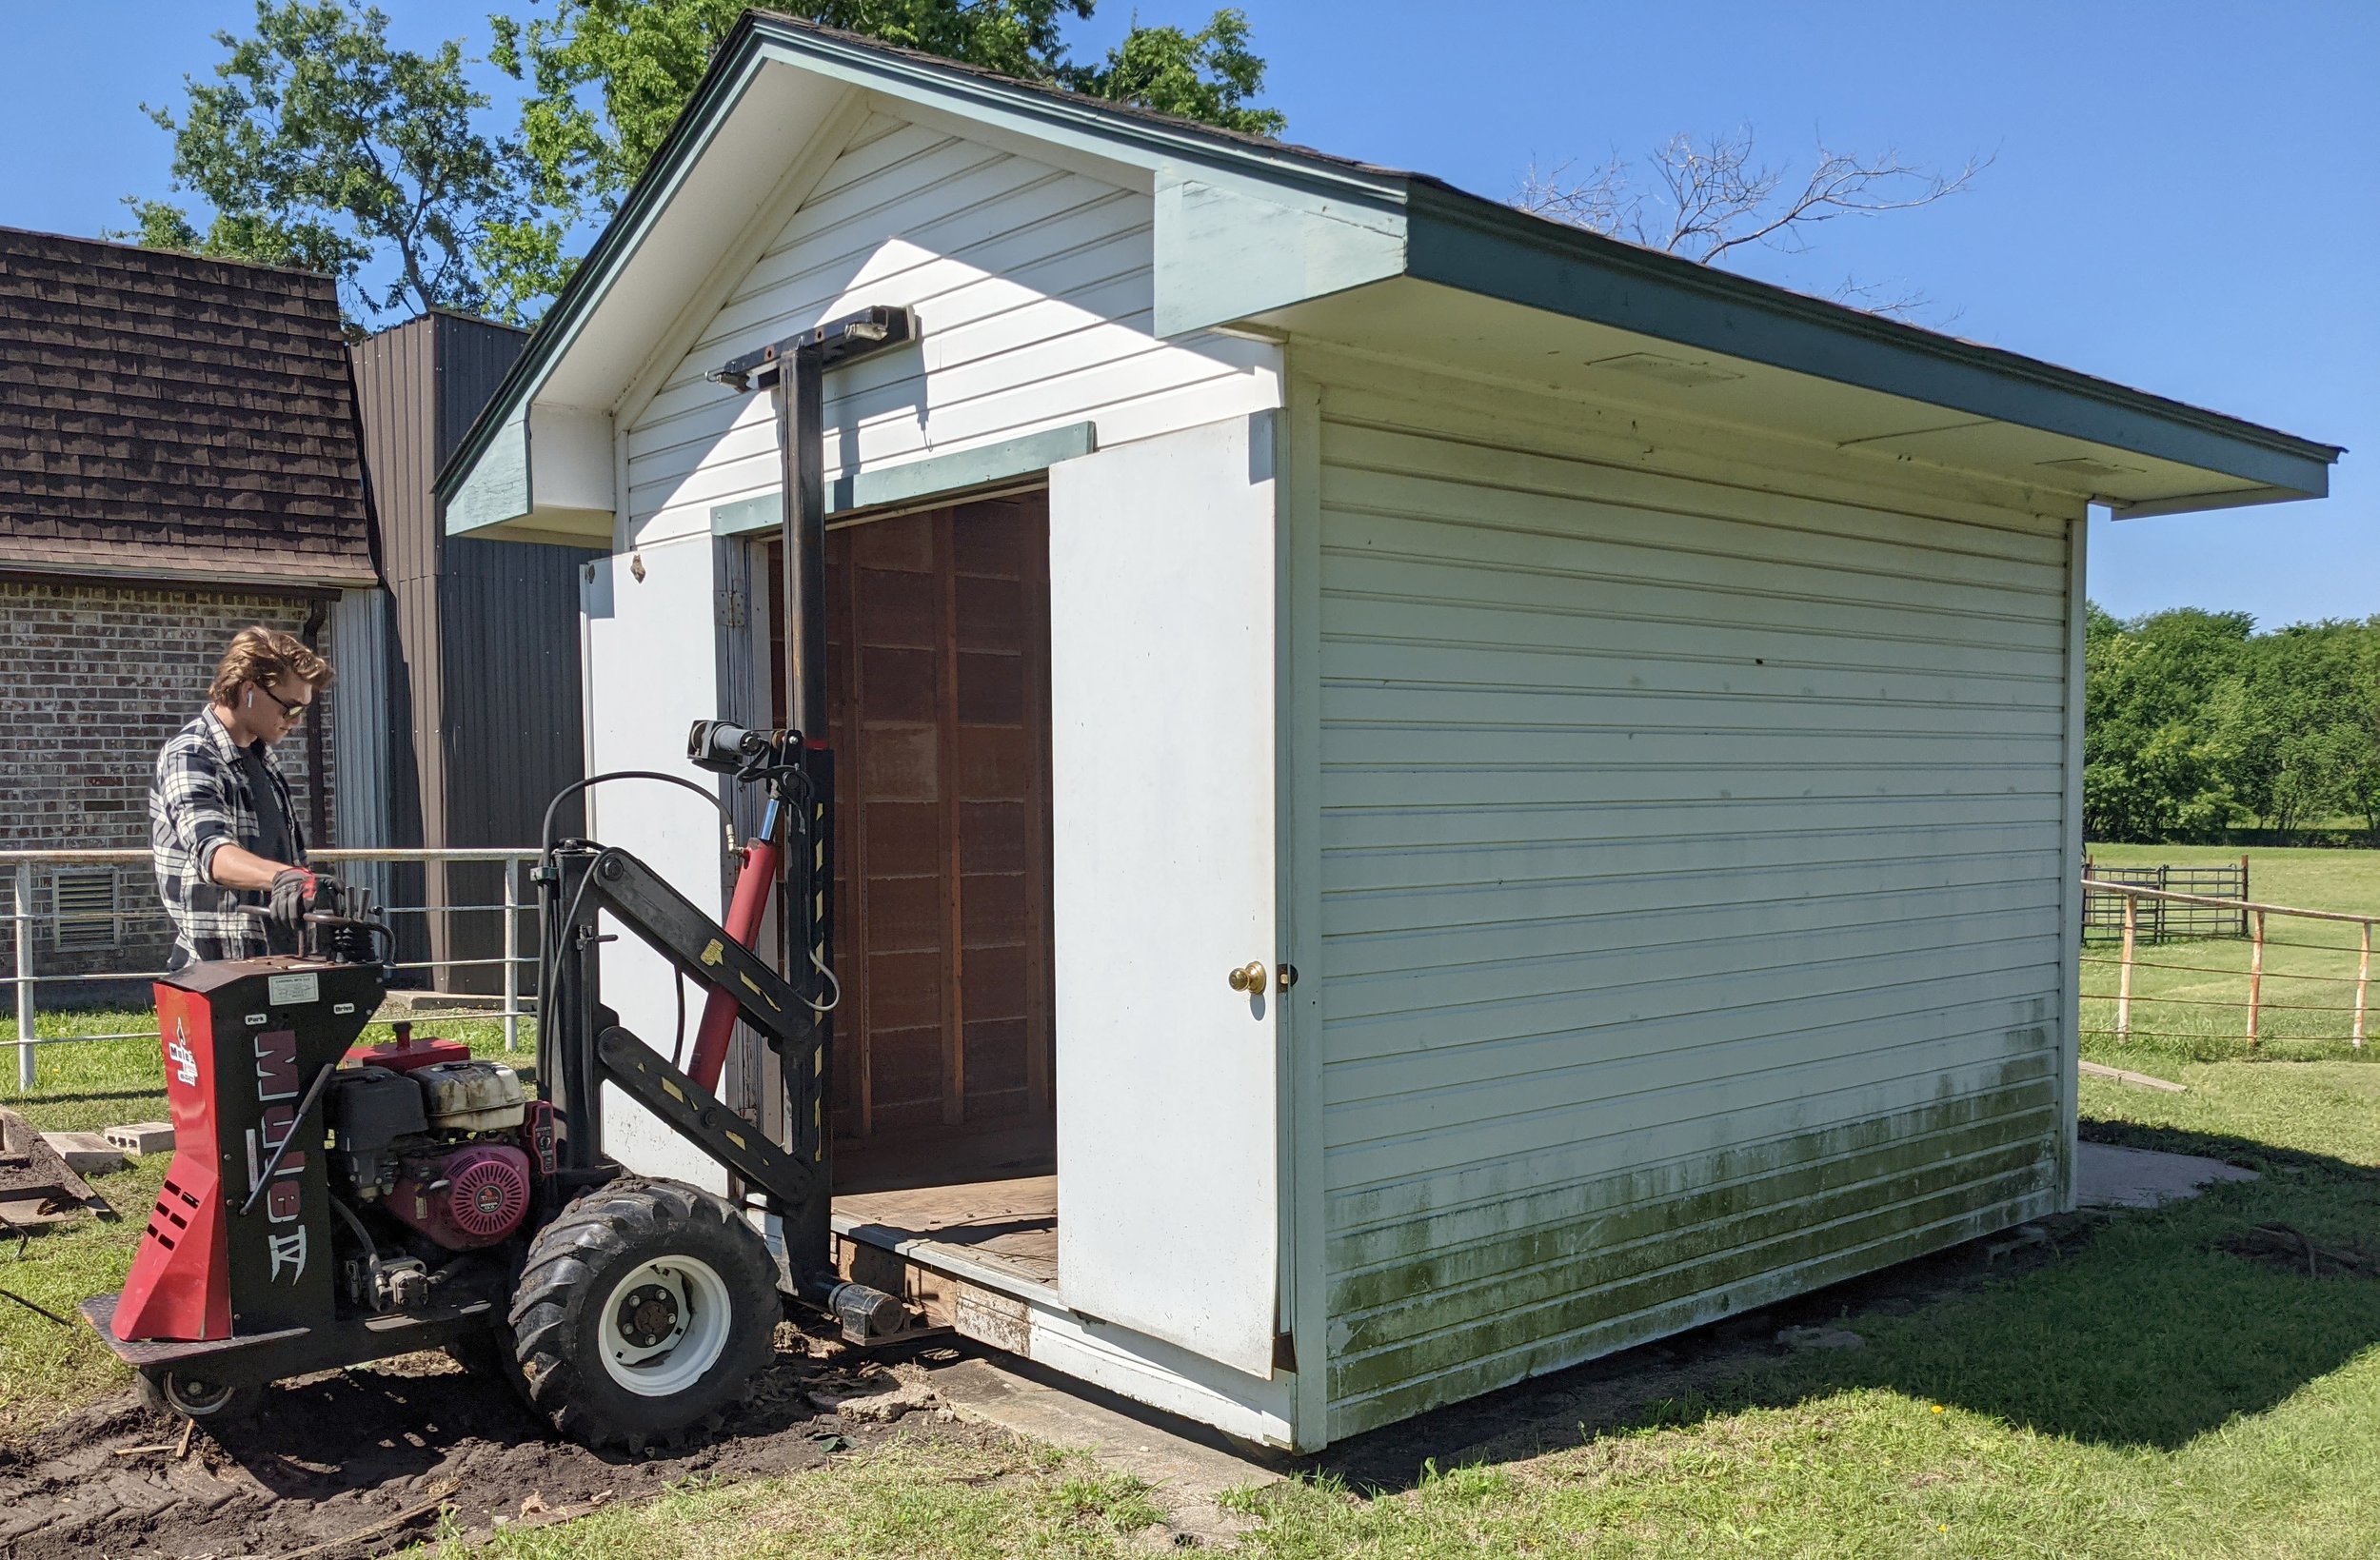
Moving the shed to a better spot!

At home behind the farmhouse - raised two feet up.
It was no easy task to get it to this point. We cleaned it up, removed the shed doors to rebuild them - they were in pretty rough shape - then added windows and the automatic chicken door. We also build a door on the back side of the coop to allow me to sweep out the pine shavings and poop - this turned out to be brilliant move, as the coop and run only take about 45 easy minutes to clean every two weeks.
At this point we figured we were far enough along to go ahead and get the peeps. This was April, and we wanted to have them grown before it got cold, so we were on a bit of a time crunch. The kids were thrilled!

Next we primed and painted the inside of the coop - the color was SW - Choice Cream. It is beautiful, keeps the odor down and makes it much easier to clean.
After painting, we built a partition inside the coop. The back half (complete with easy to clean linoleum) is home to the roosts and nesting boxes, the front half functions as storage for feed and supplies.

Sketch of the partition

Our chicken breeds: Wyandotte, Bantam, Plymouth Rock, Lavender Orpington, Silver Penciled Plymouth Rock, Olive Egger.
I left the partition unpainted, because the contrast looked beautiful. We added some crepe myrtle branches for the roosts. The chickens were still young here, but had outgrown the brooder, so we put them inside and began work on the run and nesting boxes to go in later.

Then we began construction on the run. We used cinder blocks to support the base for the run - it is 7’ deep x14’ long and 7 feet tall on the front. The base pieces are pressure treated, the rest are just common boards because I wanted to paint the run as well.
The roofing is corrugated steel roofing panels that will hold up to the spring weather here.
We primed and painted it all white to match the shed, and then trimmed the shed and run in black.
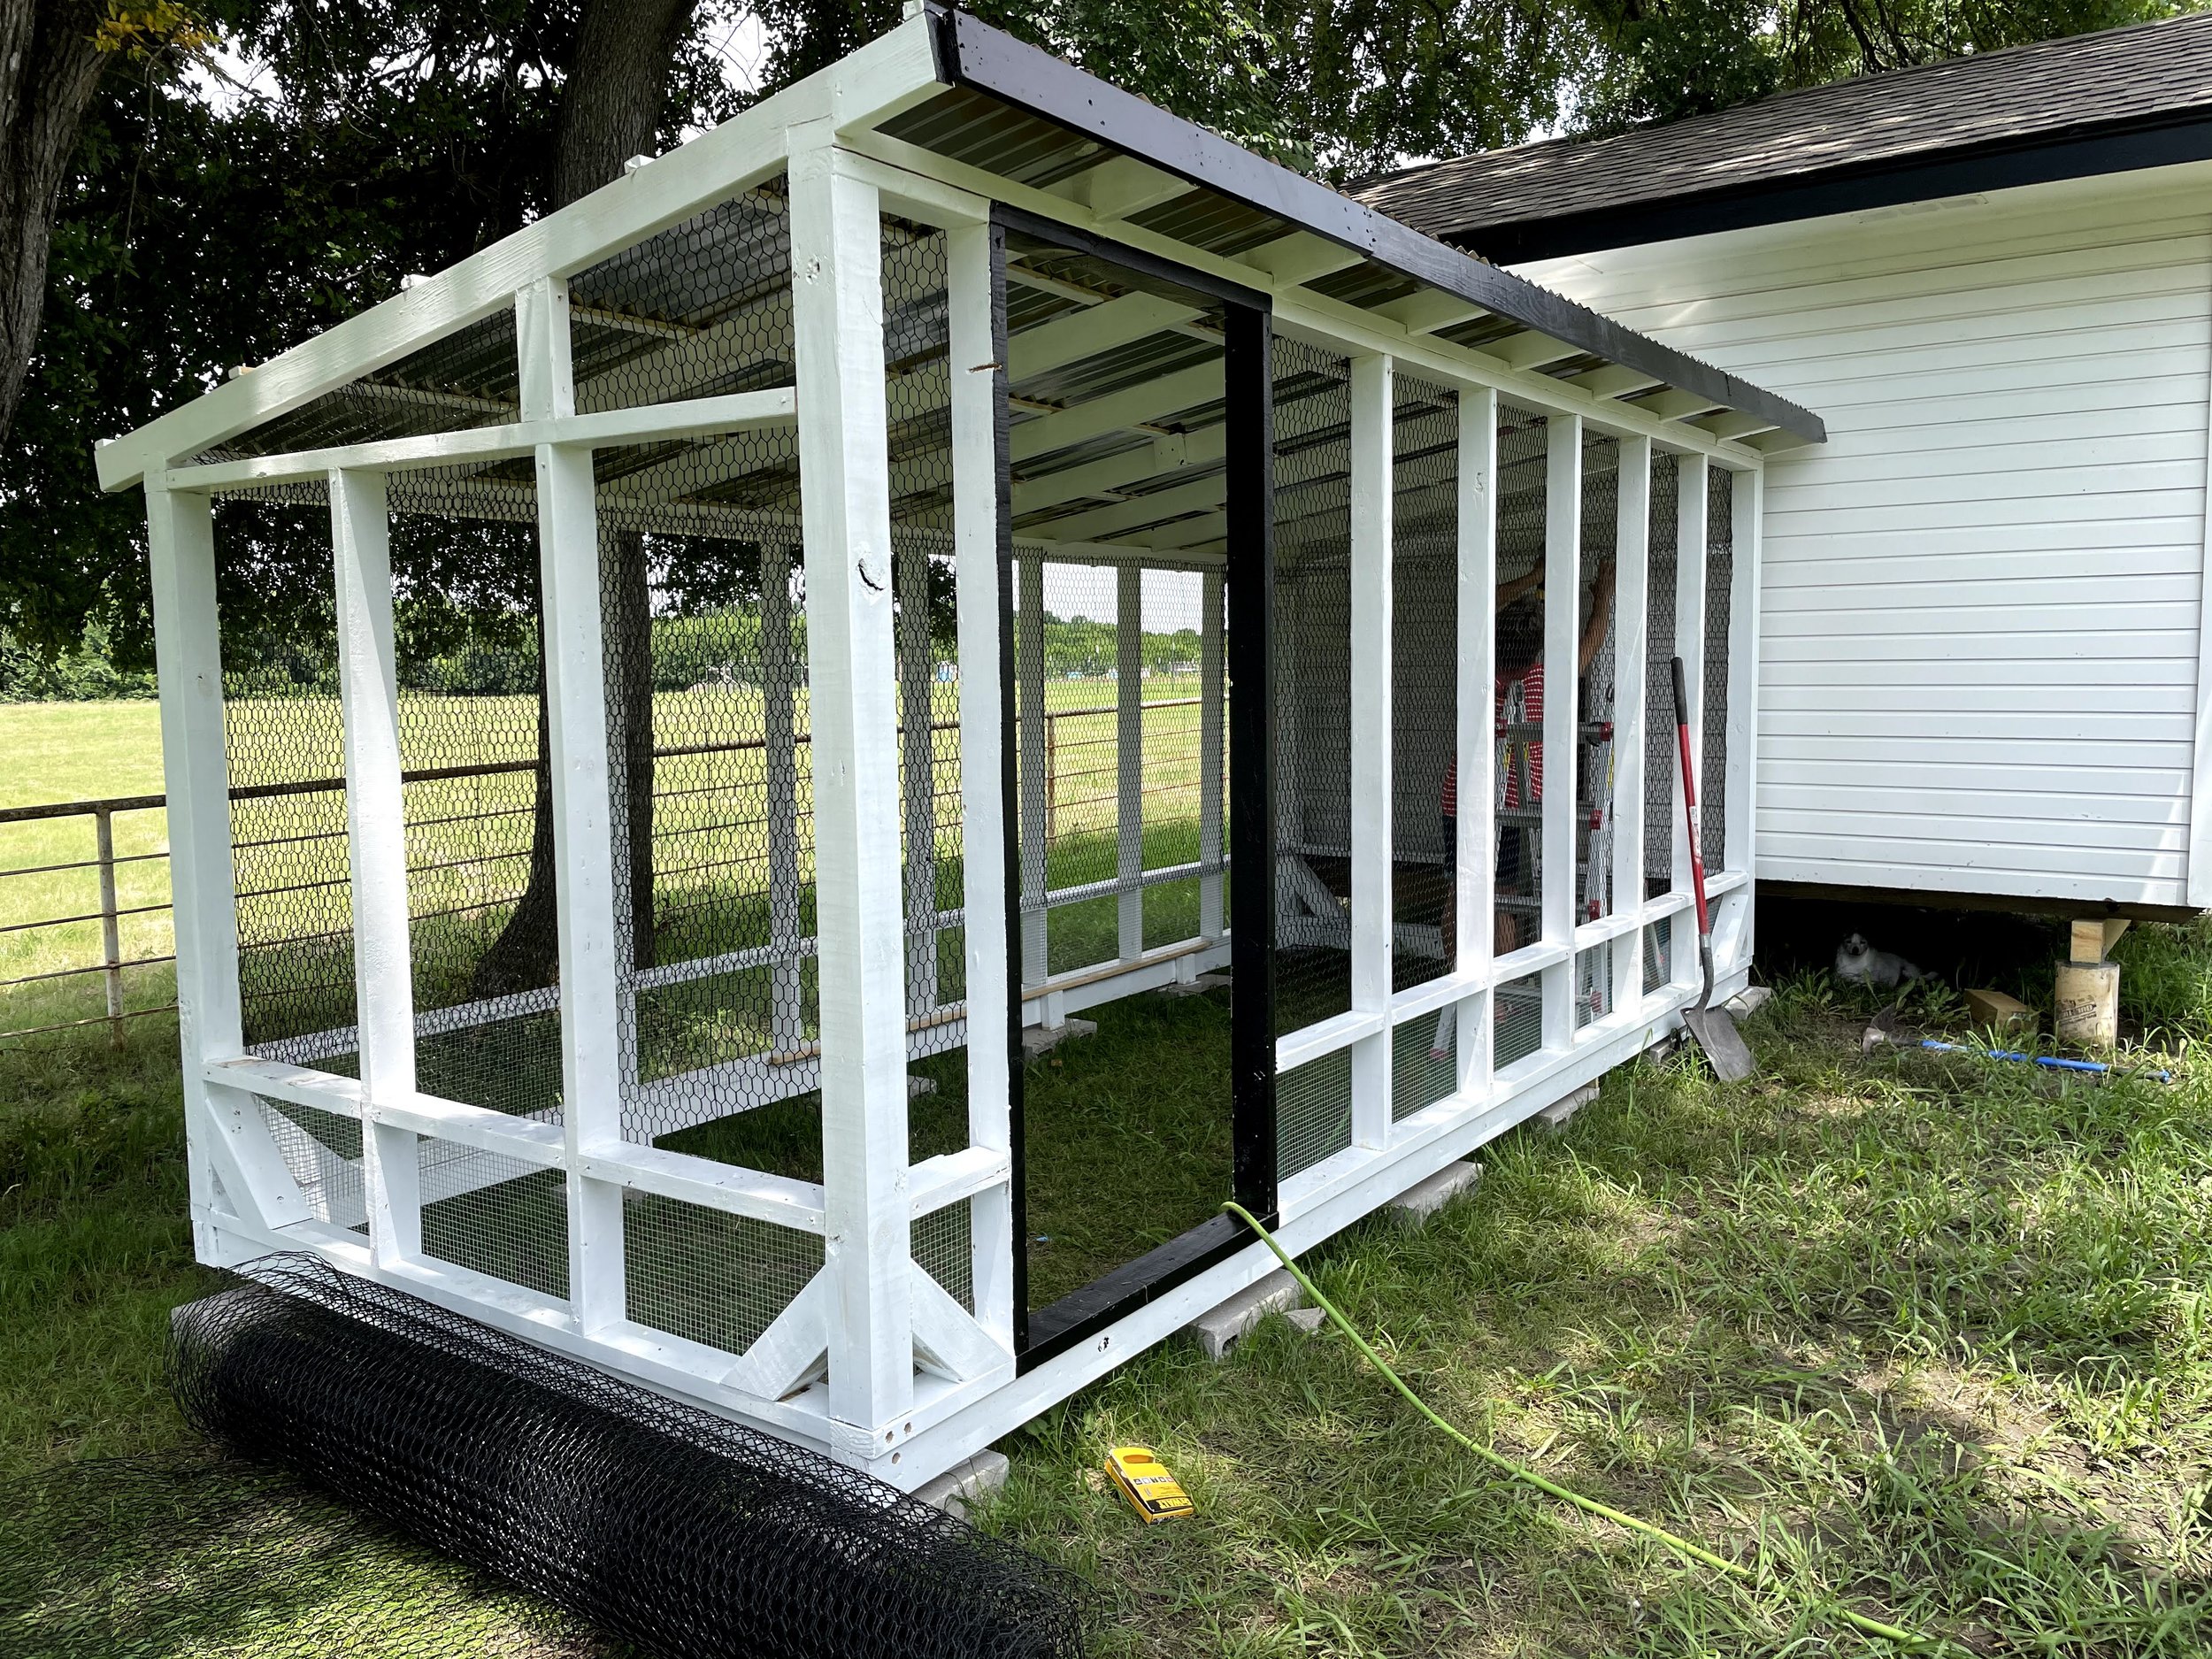
The bottom two feet of the run is designed to accept hardware wire that we stapled to the inside. Above the hardware wire we used vinyl coated chicken wire stapled to the inside. Around the base we stapled two feet of hardware wire to the outside, bent at a 90 degree and tacked to the ground to prevent anything from digging under the perimeter.

We were a bit lazy about the soft-scaping - and laid bricks around the edge of the wire and covered it with mulch. One day I will go back and put something a little better. We built a door on the run wo you can walk inside to hang out and play with the girls and easily maintain it - we keep straw on the floor and just rake it out every two to three weeks and it keeps it clean and dry.
Next to finish were the doors, stairs and skirting. At this point we felt like we would never be finished, but the girls were getting big, so we had a deadline!

All the carpentry on the doors and stairs was done by my dad - they looked awesome, Mom painted them and I added a little artwork. Mom and I did the skirting before the stairs went in - we had to build supports on the corners, then attached chicken wire and bent the bottom out at 90 degrees again to prevent anything digging under. We topped the wire with vinyl lattice, added some trim, painted white, and continued the same brick and mulch coverage to hide the wire.
Dad installed the stairs, completed the nesting boxes, we added roosts inside the run, added hardware wire screens to the back access panel and windows, and FINALLY we were finished.
The end result exceeded my expectations - the coop and run comfortably house 15 chickens right now, take just minutes a day to maintain and have become a beautiful feature of the landscape here. All in I think we spent about $3,500 on the entire project, but it is built to last, has room for more chickens as we grow, and is completely predator proof.
Please email me if you have questions, or would like to purchase plans for the coop, run and nesting boxes.